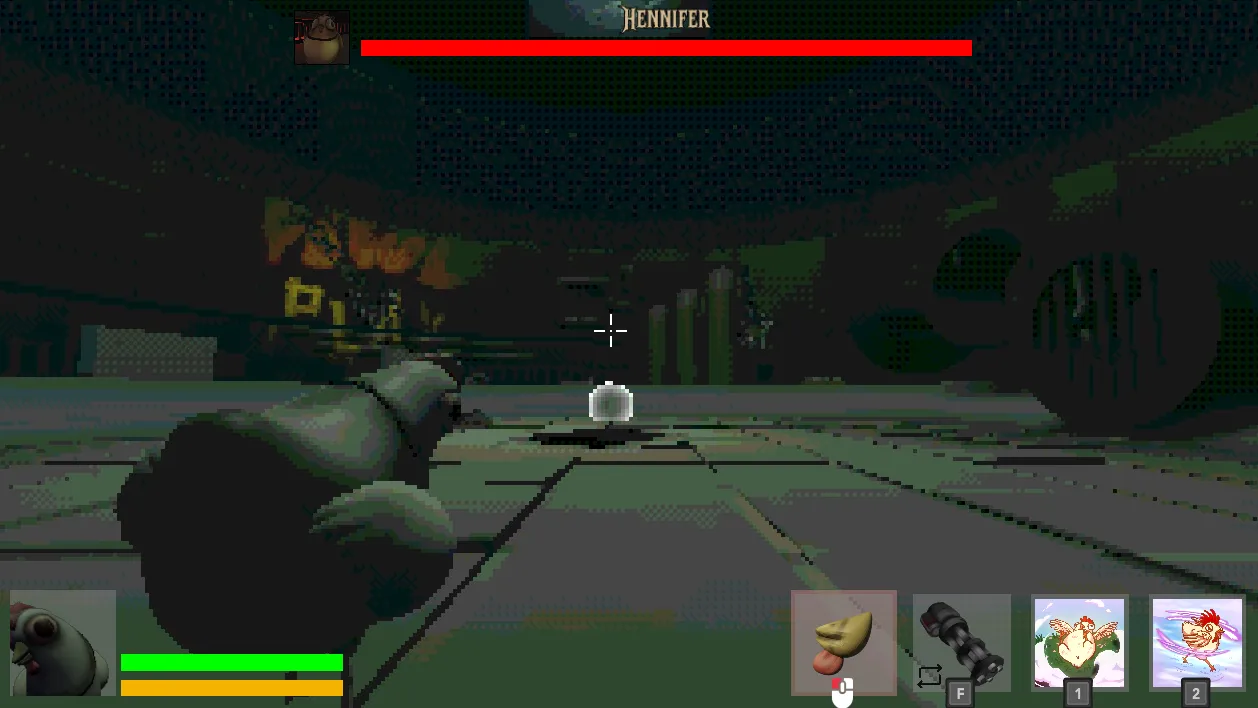
Player Hud
The Player HUD (Heads-Up Display) provides essential information and feedback to the player during gameplay. It is composed of several UI elements that display the player’s health, stamina, inventory items and visual feedback for events such as taking damage or healing.
Components
Section titled “Components”- Health and Stamina Bar: Shows the player’s current health and stamina values, updating in real-time as the player’s stats change.
- Player Icon: A visual representation of the player, rendered using a subviewport. It provides feedback with shader effects when the player is hurt or healed. Since it uses a subviewport, chicken player animations are also displayed here.
- Item Slots: Displays the player’s inventory items, highlighting the currently active item(s).
Health and Stamina Bar
Section titled “Health and Stamina Bar”The health and stamina bars provide immediate feedback on the player’s survivability and ability to perform actions. The code uses Godot’s signal system to ensure the UI stays in sync with the player’s stats, but is still seperate. This means the chicken player is not dependent on the UI, and the UI can be reused in other contexts.
- Signal Connections: The HUD listens for
init_health,init_stamina, andplayer_stats_changedsignals. This decouples the UI from the game logic, making it easier to maintain and extend. - Input Handling: The mouse mode is set to
MOUSE_MODE_CAPTUREDto ensure the player remains focused on gameplay. - Stat Updates: When stats change, the HUD updates the max values and triggers visual feedback (hurt/heal shaders) if health changes, providing immediate feedback to the player. This is done for the
in-run-upgradesystem, where the player can upgrade their (maximum) health and stamina.
extends VBoxContainer
@onready var health_bar: HealthBar = %HealthBar@onready var stamina_bar: StaminaBar = %StaminaBar

func _ready() -> void:  Input.mouse_mode = Input.MOUSE_MODE_CAPTURED
  # Initializing the health and stamina bars  SignalManager.init_health.connect(health_bar.init_health)  SignalManager.init_stamina.connect(stamina_bar.init)
  SignalManager.player_stats_changed.connect(_on_stats_changed)

func _on_stats_changed(stats: LivingEntityStats) -> void:  # updating the max values  health_bar.max_value = stats.max_health  stamina_bar.max_value = stats.max_stamina
  # trigger hurt and health shaders  if(stats.current_health < health_bar.health):    SignalManager.player_hurt.emit()  elif (stats.current_health > health_bar.health):    SignalManager.player_heal.emit()
  health_bar.health = stats.current_health  stamina_bar.stamina = stats.current_stamina
Player Icon
Section titled “Player Icon”The player icon is rendered using a subviewport, which allows for isolated rendering of the player model and its animations. This approach ensures that the icon can display real-time animations and effects without interfering with the main game view.
- Subviewport Usage: By rendering the player icon in a subviewport, the HUD can show the player’s current state, including animations, independently of the main camera. - The subviewport is set to only render objects on visual layer 2. Use the
Mask Cullingscript to set the visual layer to show up in the subviewport. - Note: Because the subviewport is facing the player, the player hud shows a different angle of the player and their animations. This means that all models and animations need to work correctly and be visually pleasing from the back and the front. - Shader Feedback: When the player takes damage or heals, the icon displays a shader effect. This is achieved by connecting to
player_hurtandplayer_healsignals and applying the corresponding shader material.
extends CenterContainer
@export_group("Shaders")@export var hurt_time : float = 0.15@export var heal_time : float = 0.25@export var hurt_shader : ShaderMaterial@export var heal_shader : ShaderMaterial
@export_group("Fov")@export var normal_fov : float = 65.0@export var effect_fov : float = 75.0@export var fov_tween_duration : float = 0.1 ## How fast the FOV changes
@export_group("Border")@export var border_starting_colour : Color@export var border_heal_colour : Color@export var border_hurt_colour : Color

@onready var duration_timer : Timer = $DurationTimer@onready var overlay_shader : ColorRect = $OverlayShader@onready var border : ColorRect = $Border@onready var camera : Camera3D = %ViewportCamera
var fov_tween : Tween ## Keeping track of the FOV tween

func _ready() -> void:  # Hide by default  overlay_shader.hide()
  # set border colour  border.color = border_starting_colour
  if camera:    camera.fov = normal_fov  else:    printerr("ViewportCamera node not found!")
  # Connect signals  SignalManager.player_hurt.connect(    func():      print("hurt shader")      _on_player_health(hurt_time, hurt_shader, border_hurt_colour)  )  SignalManager.player_heal.connect(    func():      print("heal shader")      _on_player_health(heal_time, heal_shader, border_heal_colour)  )

func _on_player_health(time : float, shader_material : ShaderMaterial, colour: Color) -> void:  if not camera:    printerr("Cannot apply effect: ViewportCamera not found!")    return
  # Setting the border colour  border.color = colour
  # Kill previous FOV tween if it's still running  if fov_tween and fov_tween.is_valid():    fov_tween.kill()
  # Create a new tween owned by this node  fov_tween = create_tween()  # Animate the camera's fov property to the effect_fov  fov_tween.tween_property(      camera, "fov", effect_fov, fov_tween_duration    ).set_trans(Tween.TRANS_SINE).set_ease(Tween.EASE_OUT)
  # Apply the appropriate shader  overlay_shader.material = shader_material
  # Reset shader visibility timer if already playing  if overlay_shader.visible:    duration_timer.stop()
  overlay_shader.show()  duration_timer.start(time) # Start timer for shader visibility

func _on_duration_timer_timeout():  if not camera:    return
  # resetting border colour  border.color = border_starting_colour
  # Kill previous FOV tween if it's still running (unlikely here, but safe)  if fov_tween and fov_tween.is_valid():    fov_tween.kill()
  # Create a new tween to return FOV to normal  fov_tween = create_tween()  # Animate the camera's fov property back to the normal_fov  fov_tween.tween_property(      camera, "fov", normal_fov, fov_tween_duration    ).set_trans(Tween.TRANS_SINE).set_ease(Tween.EASE_IN)
# Hide the shader effect overlay_shader.hide()- Camera Control: The subviewport camera is set up to only render objects on visual layer 2. It follows the player and looks at a point in front of the player. Instead of using a standard
look_at, which would rotate the camera vertically, the code adjusts the target’s y-coordinate to keep the camera at a fixed height. This ensures a stable and predictable view of the player icon.
extends SubViewport
@export var offset : Vector3 = Vector3(0.0, 1.5, -1.8)@onready var camera : Camera3D = %ViewportCamera

func _process(_delta: float) -> void:  if GameManager.chicken_player:    var player = GameManager.chicken_player
    # Position camera behind the player    var rotated_offset = player.transform.basis * offset    camera.global_position = player.global_position + rotated_offset
    # Calculate a target point in front of the player    var target_position = player.global_position + player.transform.basis.z * 5.0    target_position.y = camera.global_position.y  # Match camera's height
    # Look at the forward point    camera.look_at(target_position)
Shaders
Section titled “Shaders”On top of the player icon, shader effects are applied to provide visual feedback when the player is hurt or healed. These shaders create a dynamic and engaging user experience, enhancing the player’s immersion in the game.
Item Slots
Section titled “Item Slots”The item slots display the player’s inventory and highlight the currently active item(s). This is crucial for gameplay, as it allows the player to quickly assess and switch between items.
- Dynamic Slot Creation: The container dynamically creates item slots based on the player’s inventory.
- Active State Feedback: When an item slot is activated or deactivated (via signals), its appearance changes, providing feedback about which item(s) is/are currently active.
- Type Safety: The code checks that each item is a
BaseResourcebefore creating a slot, preventing runtime errors and ensuring only valid items are displayed.
Item Slot
Section titled “Item Slot”Each item slot is a custom control that updates its appearance and icon based on the assigned item and its active state.
class_name UiItemSlot extends CenterContainer
@export var item : BaseResource :  set = _on_update_item
@export_group("Color")@export var active_indicator_colour : Color@export var item_background_colour : Color
var active : bool = false:  set(value) :    active = value    active_indicator.visible = value
@onready var active_indicator : ColorRect = $ActiveIndicator@onready var item_image : TextureRect = $ItemImage@onready var item_background : ColorRect = $ItemBackground
func _ready():  if active_indicator_colour:    active_indicator.color = active_indicator_colour  if item_background_colour:    item_background.color = item_background_colour  _on_update_item(item)
func _on_update_item(_item : BaseResource):  item = _item  if item_image && _item:    item_image.texture = _item.icon
Item Slot Container
Section titled “Item Slot Container”The container manages the collection of item slots, handling activation and deactivation through signals.
extends HBoxContainer
const ITEM_SLOT: PackedScene = preload("uid://ckypq3131wkcv")

func _ready() -> void:  SignalManager.activate_item_slot.connect(    func(index: int ):      print("Activating item slot at index: ", index)      # Check if the item slot is valid      if index < 0 or index >= get_child_count():        push_warning("Invalid item slot index: ", index)        return      # Activate the item slot      var item_slot: UiItemSlot = get_child(index) as UiItemSlot      if item_slot:        item_slot.active = true        print("Activated item slot: ", item_slot)      else:        # Added closing parenthesis for push_warning        push_warning("No item slot found at index: ", index)  )
  SignalManager.deactivate_item_slot.connect(    func(index: int):      print("Deactivating item slot at index: ", index)      # Check if the item slot is valid      if index < 0 or index >= get_child_count():        push_warning("Invalid item slot index: ", index)        return      # Deactivate the item slot      var item_slot: UiItemSlot = get_child(index) as UiItemSlot      if item_slot:        item_slot.active = false        print("Deactivated item slot: ", item_slot)      else:        # Added closing parenthesis for push_warning        push_warning("No item slot found at index: ", index)  )  _init_item_slots(Inventory.inventory_data.get_items_sorted_flattened())
func _init_item_slots(items: Array) -> void:  print("Initializing item slots with items: ", items)  # Clear the container  for child in get_children():    child.queue_free()
  # Create item slots  for i in range(items.size()):    var item = items[i]    if not item is BaseResource:      if item != null: # Only warn if it's not null but wrong type        push_warning("Item at index ", i, " is not a BaseResource.")      continue # Skip null or wrong type items
    var item_slot: UiItemSlot = ITEM_SLOT.instantiate() as UiItemSlot    if item_slot:      add_child(item_slot)      item_slot.item = item    else:      push_error("Failed to instantiate or cast ITEM_SLOT scene.")      continue # Skip if instantiation fails
Keybindings
Section titled “Keybindings”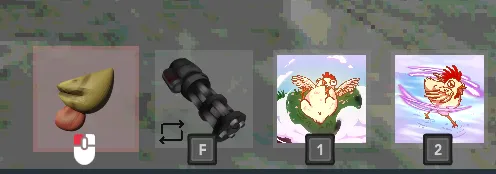
The item slots show the assigned keybindings for each item, using an addon to handle different icons and updates on input change.